Docs settings control where your docs live and which navigation features readers get. Docs design controls what the pages look like. They are separate areas because they change at different times: settings once, design occasionally.
Public or private
Docs can be public or private. Public means anyone with the URL can read your published pages. Private keeps the docs off the public site, useful for an internal knowledge base, or while you build the content before launch.
Making docs public does not publish anything on its own. Individual pages still have to be published one by one.
The docs URL
You choose the path your docs live under on your domain. Everything else is built from there: each page's URL is that base path, plus its parent chain, plus its slug.
Changing the base path rewrites the URL of every doc page at once. BrightSite leaves a redirect for each one, so existing links keep working, but it is a large change and search engines take a while to follow it. Pick a path at the start and leave it alone.
Navigation toggles
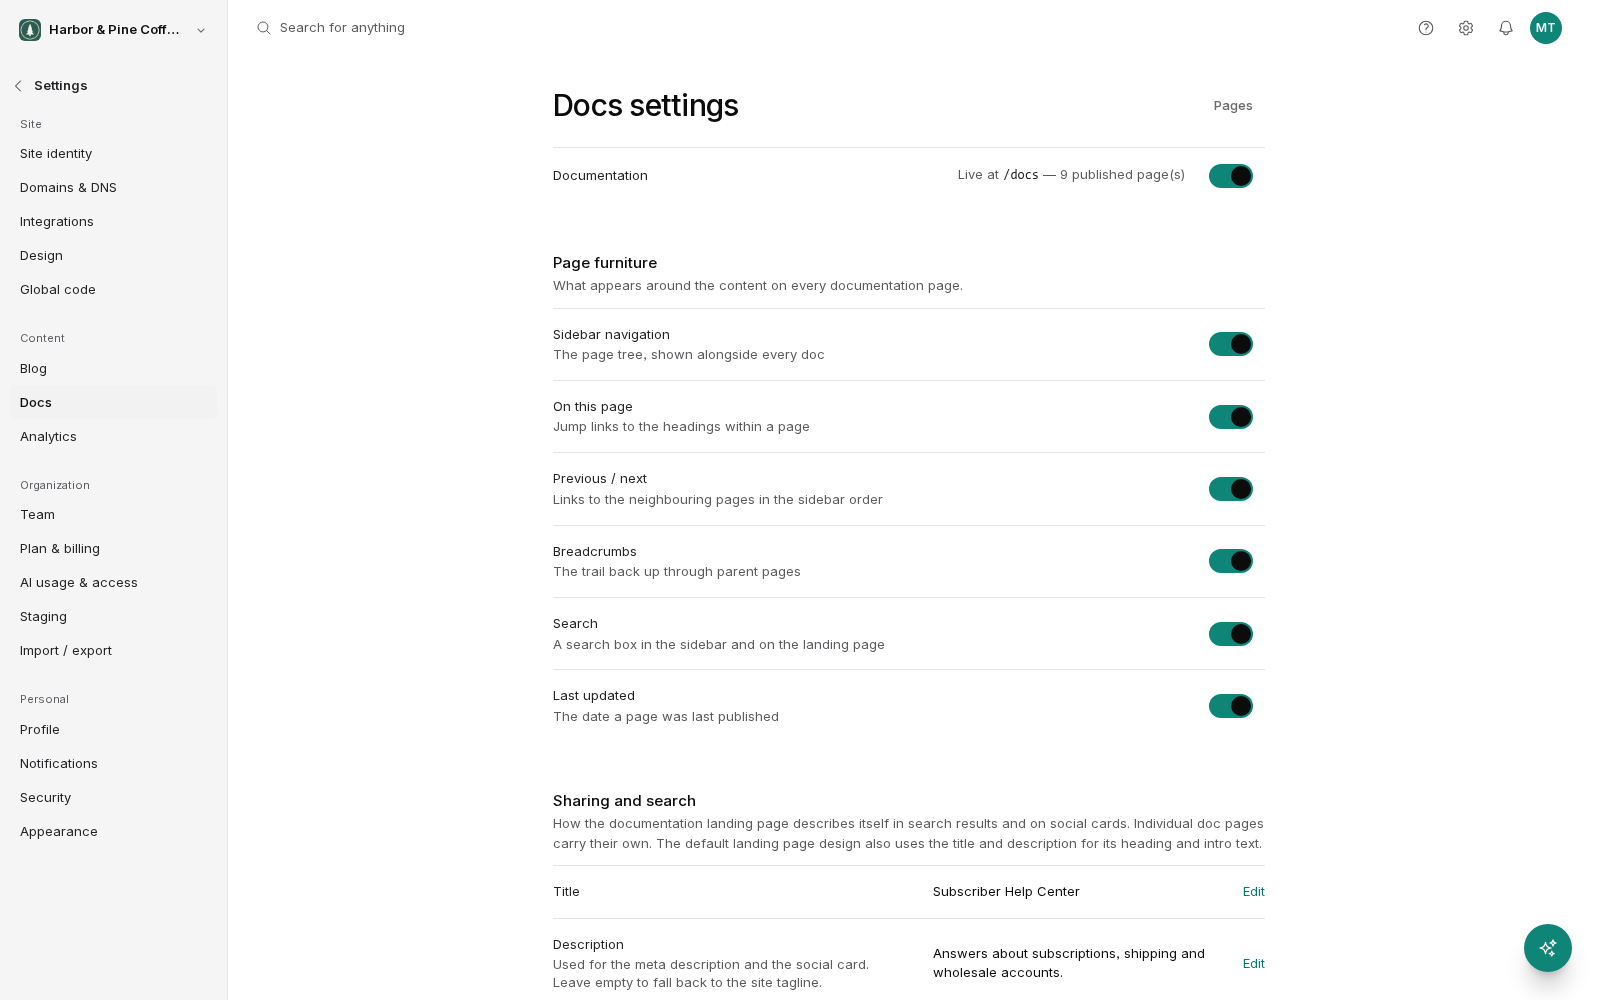
Each of these can be switched on or off for the whole docs site:
- Sidebar: the list of your pages down one side. Leave this on unless you have only a handful of pages.
- On this page: the list of headings within the current article. Most useful when your pages are long.
- Previous and next: links at the bottom of each page following your sidebar order. Good for docs meant to be read in sequence.
- Breadcrumbs: the trail showing where the page sits. Worth having as soon as you use nesting.
- Search: search across your doc pages. Becomes important once you pass a couple of dozen pages.
- Last updated: shows when the page was last changed. It builds trust on docs you keep current, and undermines it on docs you do not.
Individual pages can override the on-this-page setting. The rest apply to the whole docs site.
Design templates
Two templates control the look of your docs:
- The article page template controls every individual doc page.
- The landing page template controls the front page of your docs.
Both start from a default that follows your site's fonts and colors, so docs look like the rest of your site without any work. Edit a template when you want to change the layout, the spacing, where the navigation sits, and what appears in the header and footer of a doc page.
A template change affects every page that uses it. Check a long page and a short one before publishing, since layout problems usually show up at the extremes.
Resetting to default
If a template edit goes wrong, you can reset it back to the default. This discards your customizations for that template and returns it to how it shipped. Only the template is reset. Your doc page content is untouched.
Version history
Docs designs keep a version history. Each time you publish a template, that version is recorded, so you can look back at what changed and go back to an earlier version.
Restoring an earlier version republishes it. It goes live for readers immediately, so restoring requires publish permission. Check which version you are restoring before you confirm.
Order to work in
If you are setting docs up for the first time:
- Turn docs on and set the URL. Get this right before writing.
- Leave docs private while you build.
- Write and structure your pages.
- Set the navigation toggles once you can see how the content reads.
- Adjust the design if the default does not fit.
- Make the docs public and publish the pages.