Connecting your domain
Step by step: point your domain at BrightSite by adding records at your registrar, or hand your DNS to BrightSite by changing your nameservers.
There are two ways to connect a domain you own to your BrightSite site. Both start in the same place: Settings, then Domains & DNS, then Add domain. Type your domain without https:// or a trailing slash, for example yourbusiness.com. BrightSite sets up the www version for you.
Then pick one of these:
| Path | What you do | Choose it when |
|---|---|---|
| 1. Add records at your registrar | Copy four records from BrightSite into your registrar's DNS settings. | Your registrar lets you add a CNAME record on the bare domain (@). |
| 2. Use BrightSite DNS | Click one button in BrightSite, then change your nameservers at your registrar. | Your registrar won't accept a CNAME on @. This includes GoDaddy. Also the easier choice if you'd rather not edit records by hand. |
If you are not sure, start with path 1. If your registrar refuses the first record, or your domain page later says Partly active, switch to path 2. Nothing from path 1 needs undoing first.
Path 1: Add records at your registrar
1. Copy the records from BrightSite
Open your domain from Domains & DNS. The DNS records table lists four CNAME records. Each one has a name and a value.
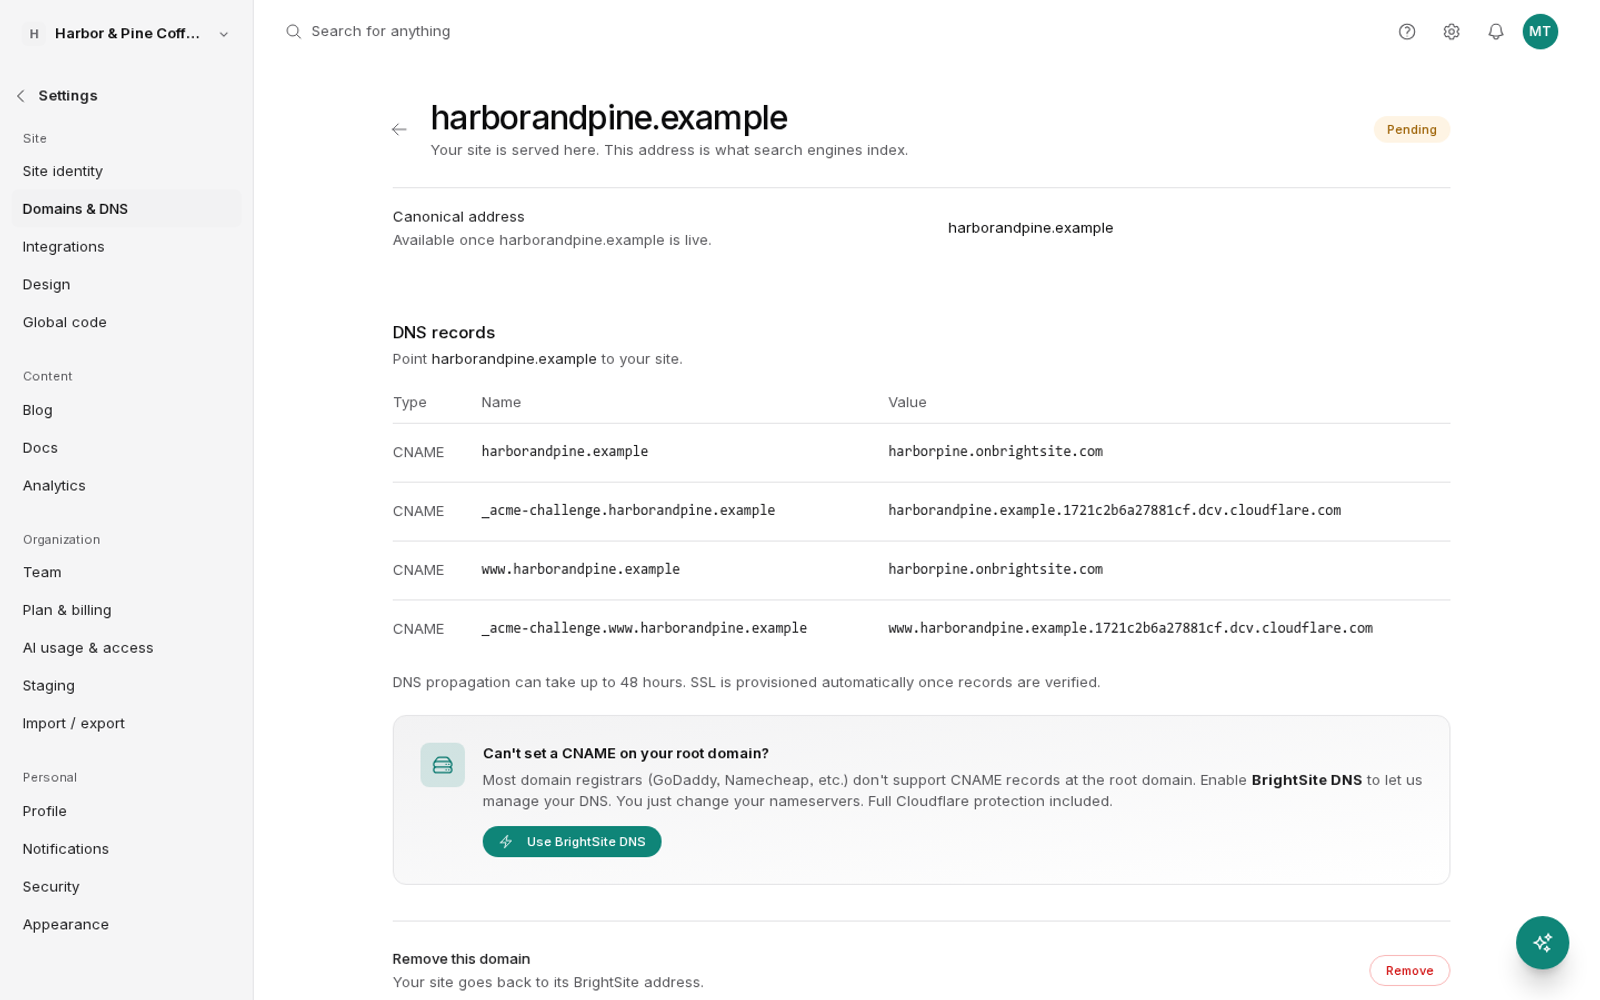
2. Add them at your registrar
Sign in where you bought the domain and open its DNS settings. Add each record as a CNAME. In the name box, most registrars want only the part before your domain, because they add the domain themselves:
| BrightSite shows | Type this in the name box |
|---|---|
yourbusiness.com | @ |
www.yourbusiness.com | www |
_acme-challenge.yourbusiness.com | _acme-challenge |
_acme-challenge.www.yourbusiness.com | _acme-challenge.www |
Paste each value exactly as BrightSite shows it. Leave TTL on its default.
Before you save, delete any existing records on @ and www that point somewhere else. Registrars often add these by default: GoDaddy, for example, adds A records on @ that show a "parked" page. Leave every other record alone, especially MX and TXT records, which run your email.
If your registrar won't let you save the @ record, use path 2 instead.
3. Wait for it to go live
DNS changes take anywhere from a few minutes to a day to spread. The badge on your domain page moves through these states:
- Pending: BrightSite hasn't seen your records yet.
- Partly active: one version works and the other doesn't. The page says which.
- Active: both versions work, with HTTPS.
The badge is refreshed once a day, so it can lag behind. To check sooner, open your domain in a private browser window.
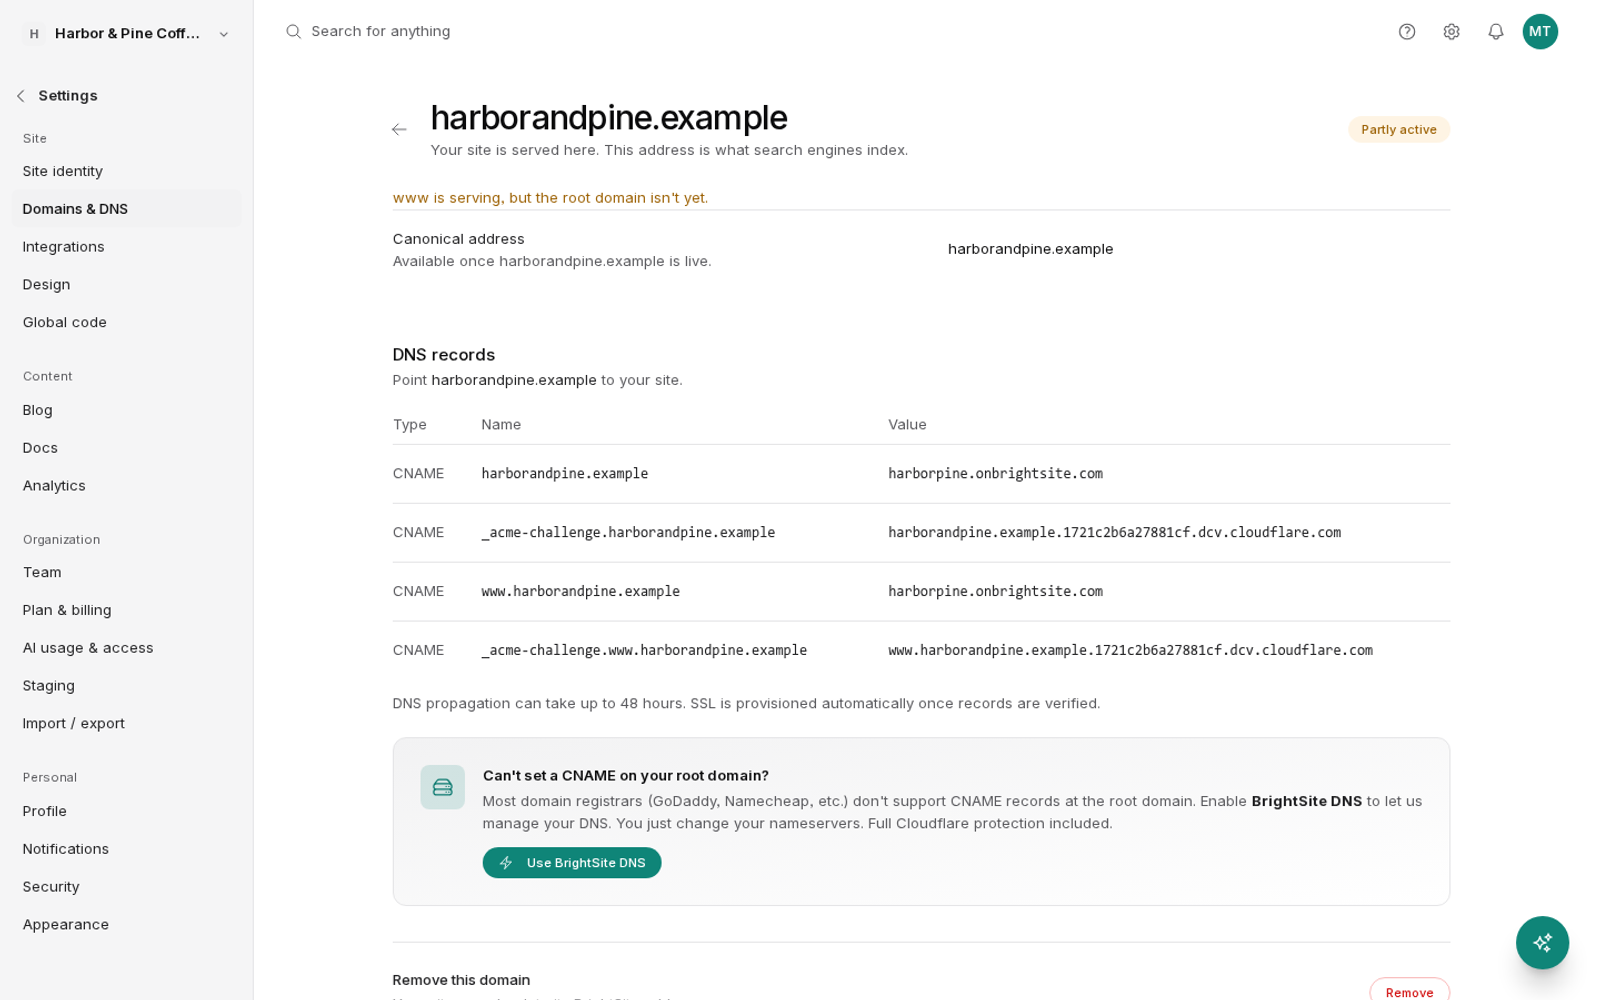
@ record is missing or an old one is still in the way. If your registrar won't take a CNAME on @, switch to path 2.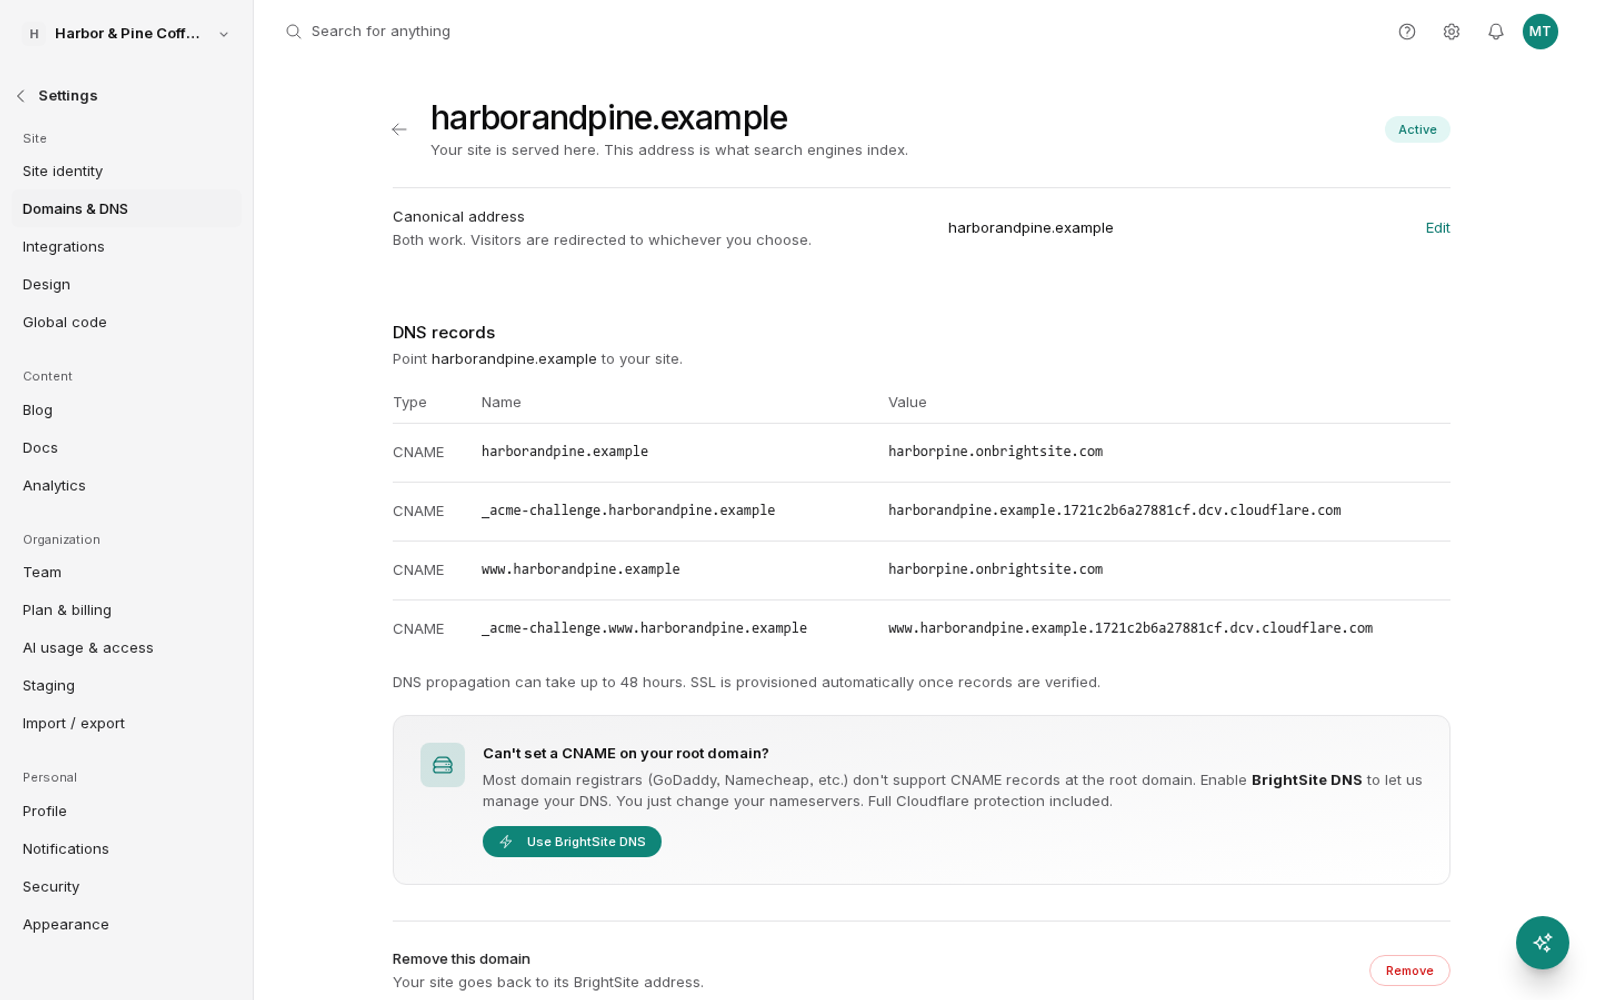
Path 2: Use BrightSite DNS
With BrightSite DNS, your domain's DNS moves to BrightSite. You change one setting at your registrar, the nameservers, and BrightSite creates the website records for you. You keep owning the domain and keep paying your registrar for it.
1. Turn on BrightSite DNS
Open your domain from Domains & DNS. Below the records table, in the box headed Can't set a CNAME on your root domain?, click Use BrightSite DNS.
2. Keep your existing records
BrightSite reads the records your domain already has and lists them. They are all ticked. Leave them ticked, especially anything mentioning mail: MX records, and TXT records starting with v=spf1, v=DMARC1 or a verification code. They keep your email working after the switch.
You won't see your old website records in the list. BrightSite removes those automatically and replaces them with its own.
Click Import Selected & Continue.
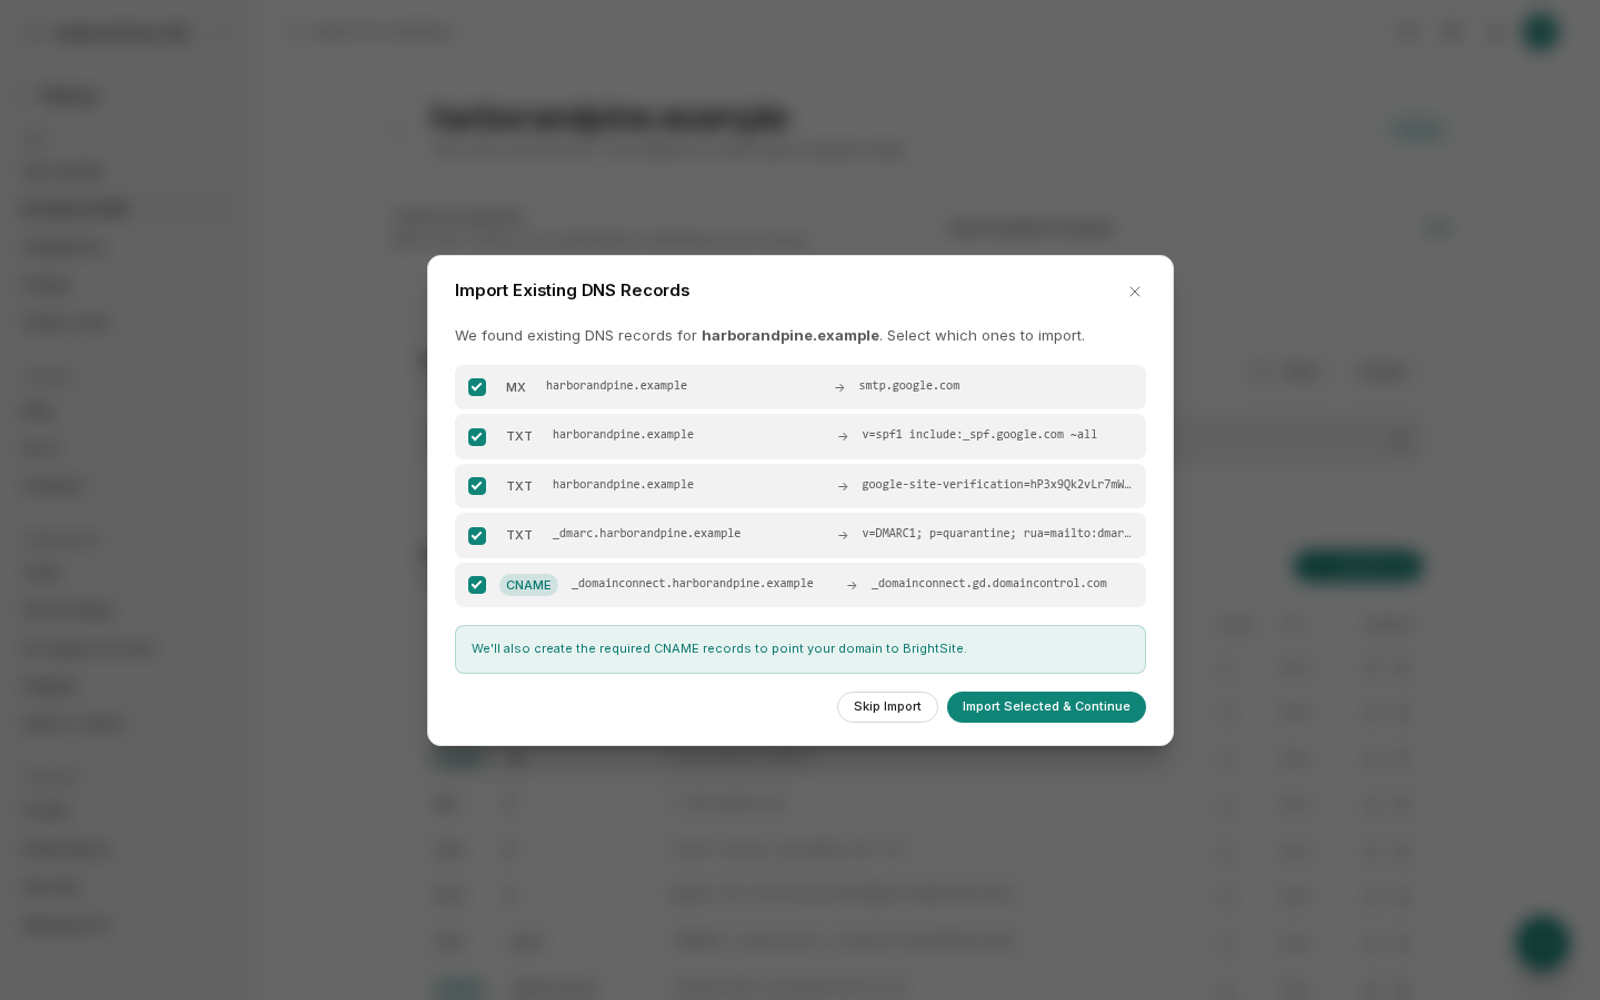
Check the list against the records at your registrar before you continue. Anything that isn't imported stops working once your nameservers change. You can add a missing record later with Add Record.
3. Change your nameservers at your registrar
BrightSite now shows two nameservers, with a Pending badge. Use the copy buttons next to them.
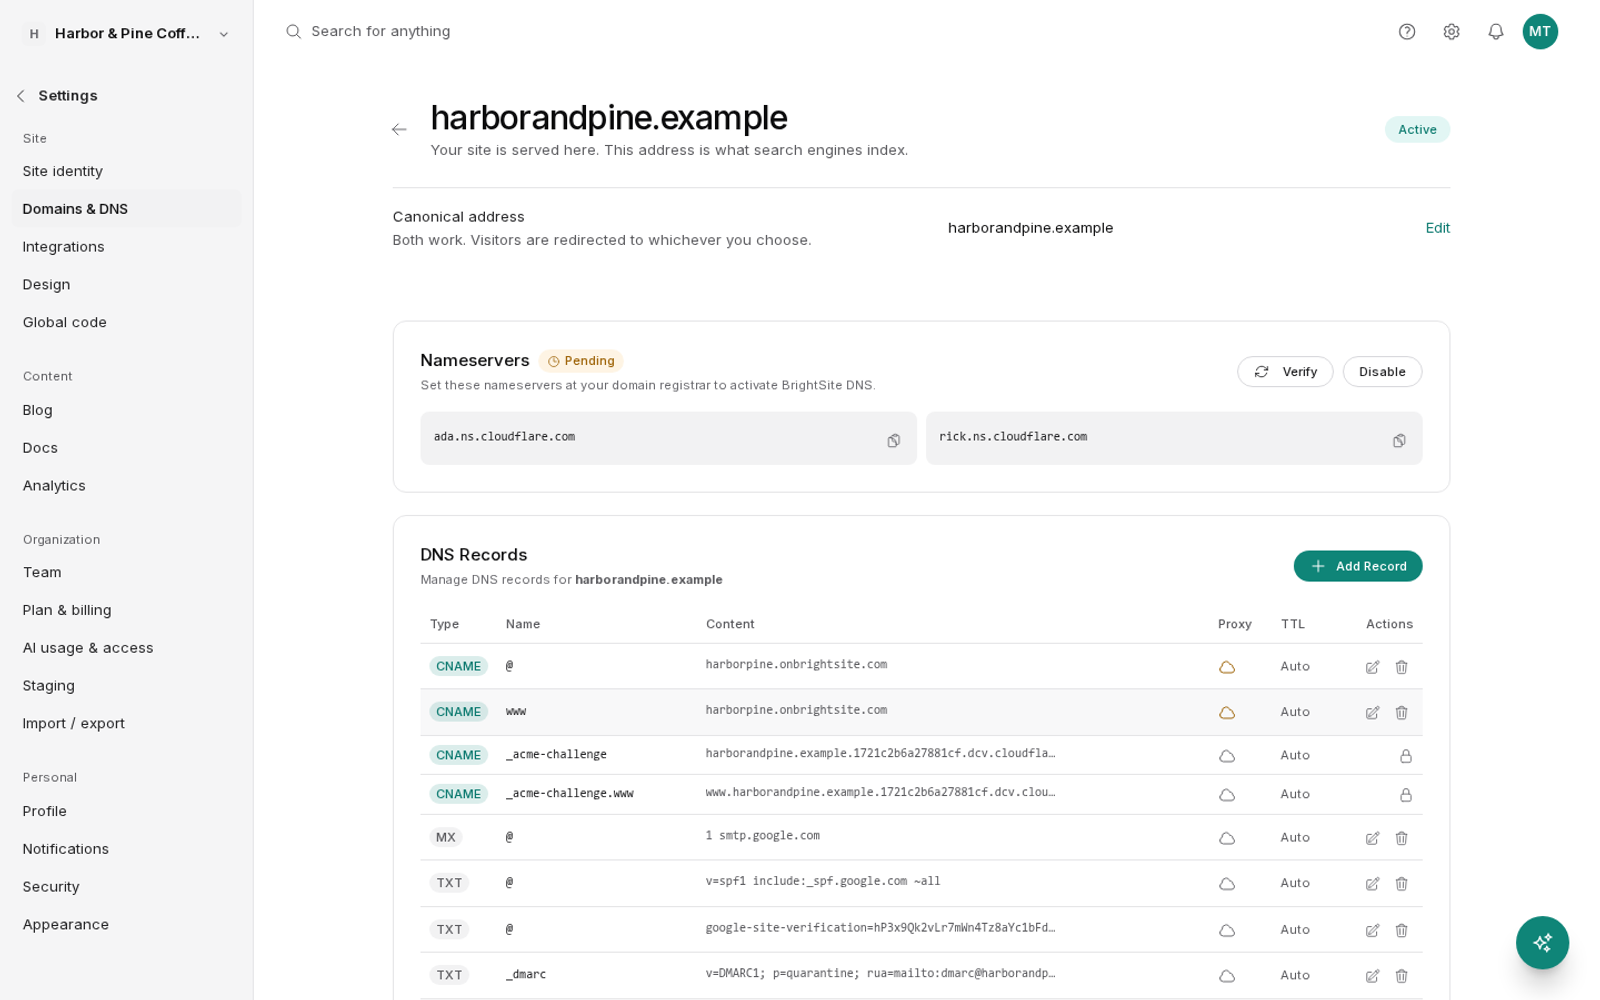
At your registrar, replace the current nameservers with these two:
- GoDaddy: open your domain from your domain list, go to DNS, then the Nameservers tab. Click Change Nameservers, choose I'll use my own nameservers, enter both, and save.
- Namecheap: in your Domain List, click Manage next to the domain. Under Nameservers, choose Custom DNS, enter both, and click the check mark to save.
- Anywhere else: look for Nameservers in the domain's settings and choose the option for custom nameservers.
Remove any other nameservers so only the two from BrightSite are left. If your registrar has DNSSEC turned on for the domain, turn it off first, or your domain may stop resolving after the change.
4. Verify
Back on your domain page, click Verify. Nameserver changes usually show up within an hour but can take up to 48 hours. Until then, Verify reports that the nameservers aren't detected yet. That's expected. Try again later.
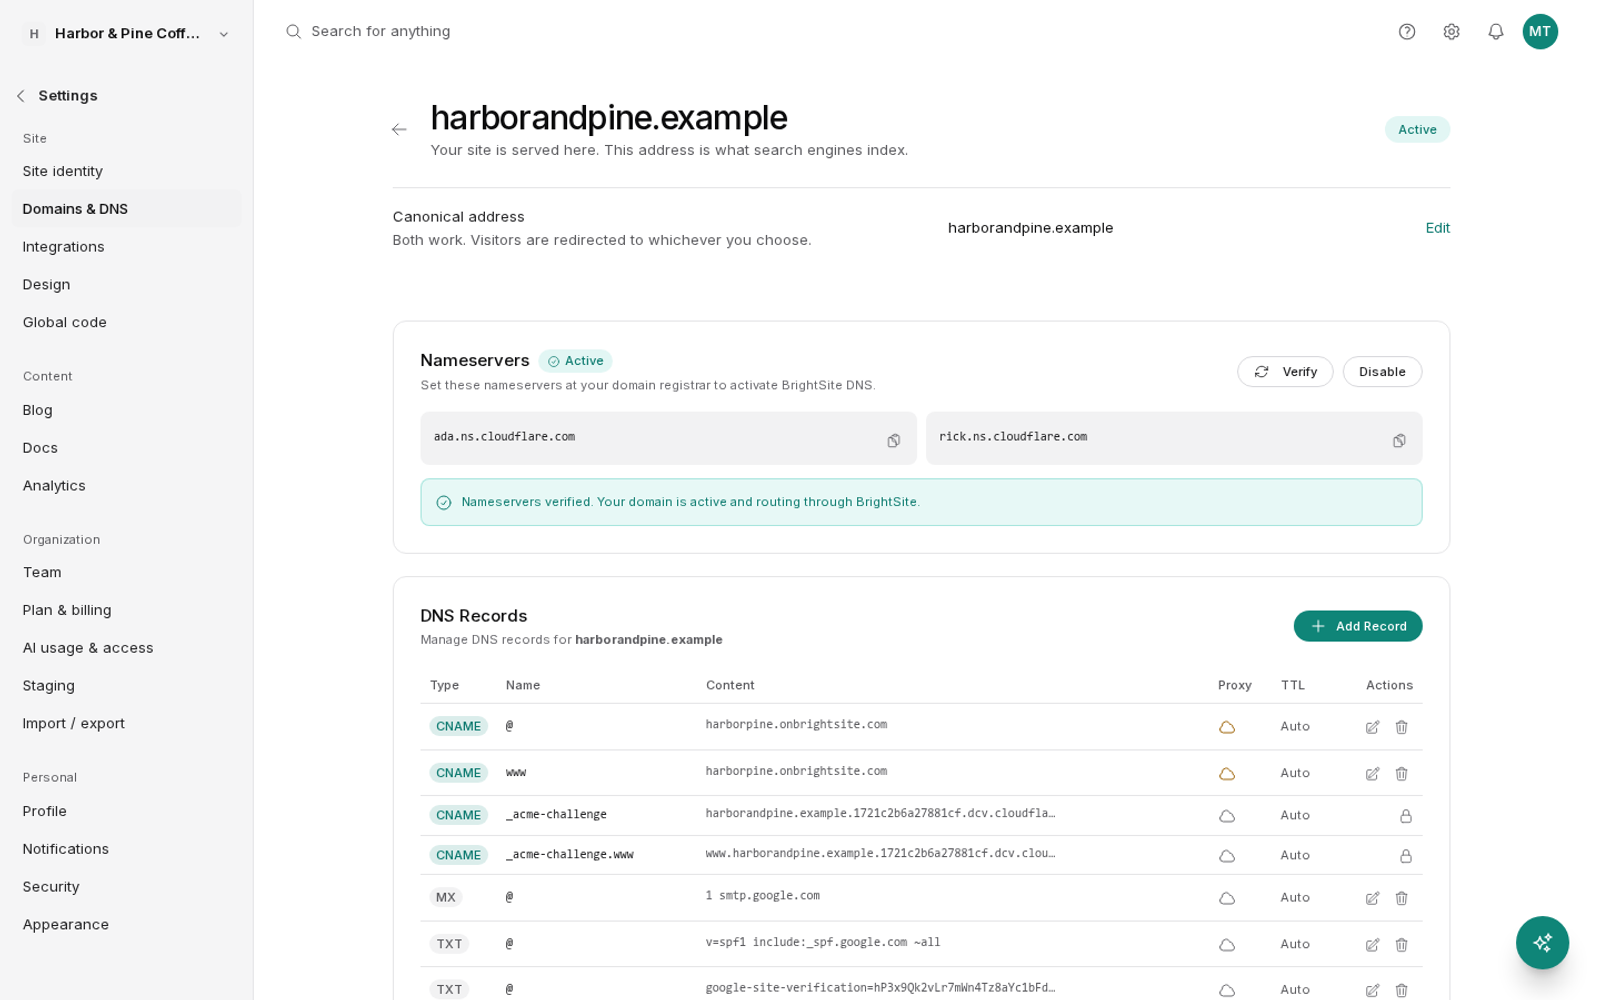
After the switch
- Make DNS changes in BrightSite, not at your registrar. Your registrar's DNS settings no longer take effect. If your email provider or another service asks you to add a record, add it under DNS Records with Add Record.
- Leave the four BrightSite records alone. They keep your site and its HTTPS certificate working. BrightSite won't let you delete them by accident.
- To go back, set your nameservers back to your registrar's defaults first, then click Disable. Disabling first takes your site and email offline until the nameservers change back.
Related
- Custom domains: choosing your primary address, www or not, and certificates.
- DNS records explained: what each record does.
- My domain isn't working: what to check when it doesn't load.
Last updated September 23, 2026