The first time you sign in to BrightSite, a short setup window walks you through naming your site and choosing a starting design. It takes a couple of minutes and everything it asks for can be changed afterward. This page covers what each step wants and where those settings live once you are through.
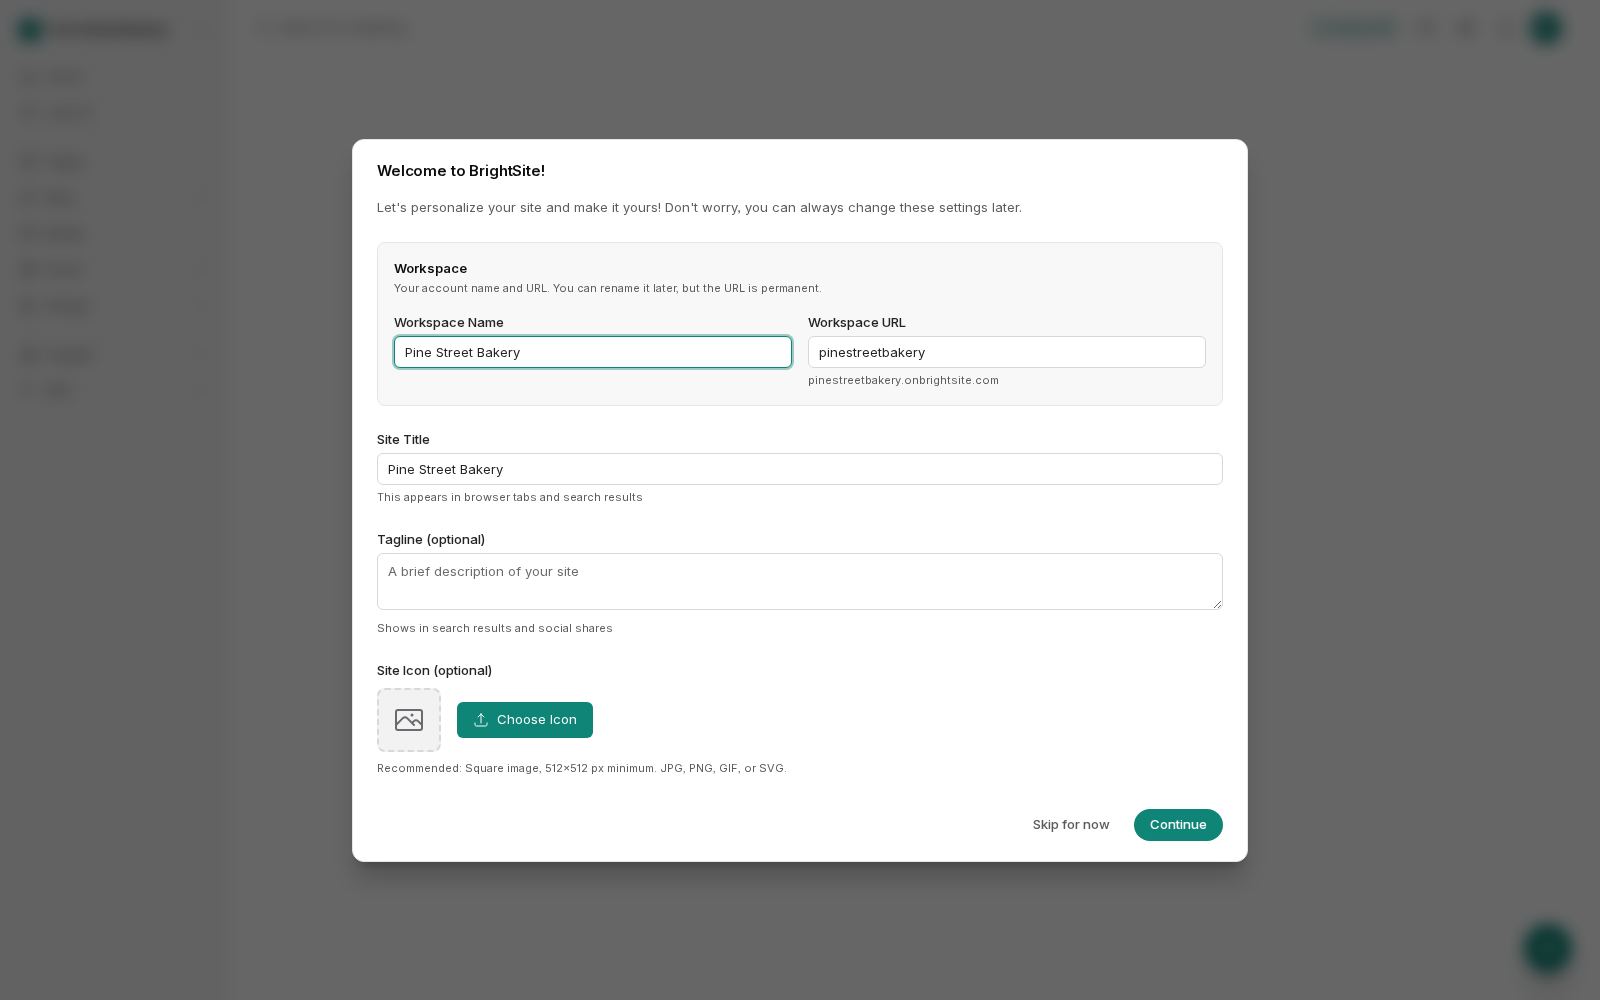
Step one: your site's identity
The first screen is headed Welcome to BrightSite! and asks for a handful of basics. It opens with a reminder that you can change all of it later. That is true, so do not agonize over any of it.
There are two groups of fields.
Workspace
- Workspace Name: what your account is called. This is for you and your team, not for your visitors.
- Workspace URL: a short word that becomes the web address you use to sign in and manage your site. You can rename the workspace later, but this address is meant to be permanent, so pick something you will still recognize in a year. Your business name is usually the right answer.
Site details
- Site Title: your site's name as visitors see it. It shows in the browser tab and in search results.
- Tagline: optional. One short line describing your business. It can appear in search results and when someone shares a link to your site.
- Icon: optional. The small square image that shows in the browser tab. Upload a JPG, PNG, GIF, SVG, WebP or ICO file up to 5MB.
Fill in what you know and click Continue.
You can skip this step
There is a Skip for now button at the bottom. Take it if you would rather get straight to your site. BrightSite uses your account name as the site title and you can fill the rest in whenever you like.
Step two: choosing a template
Next you are asked to Choose a Template, a ready-made starter site with pages, layouts and styling already built. Each option shows a preview image, a name, a short description, and sometimes tags describing the sort of business it suits. One may be marked Recommended.
Click the one you like, then click Complete Setup. You cannot finish this step without picking something.
The screen says you can customize everything later, and that is the point of a template: it is a starting point, not a commitment. Every page, color and word in it is yours to change.
You may not see this step at all
If only one template is available on your account, there is nothing to choose between, so BrightSite skips the picker and sets that template up for you automatically. Going straight from the first screen to the finish is normal, not a fault.
Step three: you're all set
The last screen confirms your site is built and gives you two things to do:
- Edit your site: opens your list of pages so you can start replacing the template's words with your own.
- View your website: opens your live site in a new tab, exactly as a visitor sees it.
Your site is genuinely live at this point. If that makes you nervous, remember that the starter content is placeholder text about a fictional business, and nobody knows the address yet.
Setup only runs once. Come back to this address later and you will just see this final screen. There is no way to accidentally restart it and overwrite your work.
Changing any of it later
Nothing you entered is locked in, apart from the workspace URL.
| What you set | Where to change it |
|---|---|
| Site title, tagline, icon | Settings → Site Identity |
| Workspace name | Settings → Site Identity |
| The template's pages and wording | Pages |
| The template's overall look | Layouts and Components |
| Your own web address | Settings → Domains & DNS |
The most common next move is to connect your own domain name so visitors reach your site at your business address rather than the one BrightSite gave you.